- How To Book
- Services
- Use us for
- Moving to
- Movers guide
- Insurance
- FAQs
- Blog
- Get in touch
- English
How to pack your Bedroom
Packing your bedroom is something you need to do properly: You spend about a third of your life in this room, so it is likely to contain items you value.

Packing your bedroom: Beds
We shall handle your beds and mattresses with the utmost care and consideration while we have them in our possession. However, you want them to arrive in the same condition and avoid the odd scuff or dusty mark. European Moving strongly recommend that you use a high-quality mattress protector, wrap the bed in heavy-duty plastic sheeting and use cardboard corner protection. We also recommend that you thoroughly disassemble the beds and that you remove and empty all drawers. Make sure you remove all covers and linens – they make a good filler for empty spaces in boxes or extra protection for breakable objects.
Quality packing materials can be readily purchased online, or some larger DIY stores may stock a limited amount.
To minimise the risk of any damage or scuffs, make sure there are always two people available to carry the bed. Place down a blanket or covering before putting the mattress on the floor of the van.
Keep the mattress upright so you can quickly push or carry it whilst inside the property.
Standard mattresses travel on their side without problems. Memory foam mattresses, however, should be laid flat; therefore it is a good idea to leave it until the end and lay it on top of the load. DO NOT FOLD YOUR MATTRESS.
Packing your bedroom: Bed Frames
It is a good idea to take notes when disassembling your bed. It will help when you want to put it back together at your destination; pictures and videos are also useful. Place all screws, nuts and bolts into a bag and attach to part of the frame. The pieces can be laid flat on the base of the moving van.
Packing your bedroom: Headboards
Unscrew the from the bed, place all hardware into a bag and tape to the headboard. Place fabric headboards inside a large, heavy-duty plastic bag or a cardboard box. Wrap in protective moving blankets your wooden headboards.
Packing your bedroom: Wardrobes
Wardrobes are one of the challenges when you start packing your bedroom. You should disassemble your wardrobes if you can: They will be easier to move out, easier to carry and more importantly less likely to be damaged. The Ikea flat-pack types of wardrobes do not travel well assembled and are unlikely to arrive in good condition at your destination. We very strongly advise that you disassemble and flat pack them. We are happy to transport your wardrobes assembled, but this is at your own risk. Please ensure that you have considered the access constrictions for such large items going to your destination property – stairwells can be tricky.
You should wrap your assembled wardrobe with moving blankets and protect the corners with cardboard or plastic casing. Make sure you have a minimum of two people for lifting. If the doors don’t shut securely make sure you use straps, rope or tape to keep them closed and stack some goods in front of them, so they don’t open during transit.
You should wrap your disassembled wardrobes in bubble wrap and moving blankets and tape any hardware to the pieces.
We found this useful YouTube video for packing Wardrobes in dedicated boxes, from a moving company based in Massachusetts.
Packing your bedroom: Chest of Drawers
Ensure you empty all drawers, taking time to remember the order they came out as this will help at the delivery end. Most chests of drawers require two people to lift them; please remember our vans do not come with loading equipment such as trollies.
Packing your bedroom: Mirrors
Mirrors are another challenge that is thrown at you when Packing your bedroom. Tape any hardware to the back of the mirror. Wrap the mirror in moving blankets and make sure you mark it as fragile, mark this on your inventory list and let your mover know. An excellent place to put mirrors is between the mattresses for transport; you need to remember it’s there and don’t put any heavy items on top.
How to pack your Living Room
Packing your living room is a delicate job as it involves glass, leather or fabric, and they are not the easiest to protect.

Packing your Living Room: Sofas
A good place to start when you’re packing your living room: remove all cushions and pillows and place them into large bags or suitable protective coverings, remember these can be used to fill in any gaps in the moving van or to add additional protection to more fragile items.
You will need to consider how you are going to get the sofa out of your house, in some cases windows may need to come out to accommodate this removal.
You will need to make arrangements for this prior to collection, our movers are not qualified to do this.
Measure the longest dimensions – height, width and depth. Remove the feet if required and place them together with any hardware into a plastic bag or box. Take extra time to plan the route out of the house. You can slide as far as you want if you use cardboard underneath, and only lift when you need to.
Once the sofa is out of the house, take the time to adequately wrap it; shrink wrap is ideal. Also, make sure it doesn’t scrape along with any sharp corners that could tear the upholstery when loading onto the van.
Sectional sofas are much easier to move and each section should be shrink-wrapped for maximum protection.
Recliners tend to be much heavier than standard sofas. Please bear this in mind when lifting and make sure adequate manpower is available on both collection and delivery. Use some rope or cord to secure shut so that they don’t pop open whilst in transit.
Packing your Living Room: Occasional and Coffee Tables
Take time to protect the corners with cardboard or protective casing. Place blankets on the floor, pull them up and wrap around the entire table securing them with tape. It is easier if you have two people to carry your coffee tables. For smaller end tables it is possible for one person to lift them – please always check first and don’t attempt to do this if you are not sure.
If they are glassed, remove all glass panels and wrap them individually with plenty of bubble wrap. Then use moving blankets, secure them with tape for the outer layer and sandwich them between two layers of cardboard. Be sure to mark them as fragile and make your mover aware of them. Ideally, you want to transport them between two mattresses or similar and secure them with straps or rope to the side of the van so that they don’t fall flat. Treat the rest of the table the same as any ordinary coffee table.
Packing your Living Room: Bookcases
Very often the piece de resistance when you’re packing your living room. Before you move the bookcase remove everything from the shelves. We recommend having a spare box on the side for any unwanted books. You can take them to the charity shop later. Remember books are very heavy and can take up a lot of the weight allowances so it’s a good time to have a clear out.
Keep the weight of each individual carton no higher than 15 k. Use smaller boxes and take care not to overload them, making them too heavy.
If using larger boxes pack one layer of books and fill the rest with lighter items like cushions and towels. Pack your book’s spine up as this will help to fit as many in as possible. Add a layer of packing tape to reinforce the bottom
If you can. remove the shelves and wrap these separately using plenty of bubble wrap and packing tape. Place any hardware in a separate bag and wrap it up with the shelves.
Wrap The bookcase in moving blankets and secure them with moving tape. Take extra care on the corners using cardboard and extra casing. Most bookshelves will require two people to carry them.
How to pack your Kitchen
Packing your kitchen is probably the last room you will do, yet some work needs to start earlier to avoid last-minute panic. The following guidelines may help.

Packing your kitchen: Refrigerators
It is tempting to leave the fridge/freezer on until the last minute when you are packing your kitchen. You need to start earlier though: It usually takes around six to eight hours for the freezer to defrost completely. Make sure it has been unplugged, cleaned and if it has an ice maker, disconnected from the water source. Place any connectors into a bag and tape them to the back of the fridge.
We do not recommend that you pack perishable foods when moving long distances. If you choose to do this it will be at your own risk.
Remove all shelves and compartments and pack them in a separate box; take the time to wrap them individually in bubble wrap. Remove any items that are pinned to the outside of the fridge.
Wrap stainless steel refrigerators in moving blankets and secure them tightly with tape and/or cord to prevent scratching. Do not tape closed other refrigerators as this can sometimes leave a residue. Use zip ties or bungee cords instead.
You will need at least two people to move a refrigerator. An American refrigerator will need at least four people. Please remember that we do not supply any moving equipment. Secure the refrigerator upright to the back or side of the van and against other large furniture. You should use straps or ropes to prevent it from tipping over.
On delivery, make sure you leave your refrigerator unplugged and upright for a minimum of three hours to settle. When you do plug it back in please bear in mind it can take up to three days for it to get back up to the correct temperature.
As with any electrical appliance, you may need to change the plug once in your new country. If you are not confident in doing it yourself, ask an electrician to do it for you. It may be easier to do it before leaving, as you’ll be able to plug them back as soon as you wish on arrival.
Packing your kitchen: Cookers
When packing your kitchen, you want professionals to disconnect your cookers and you may need to instruct a CORGI plumber or an electrician to safely organize this.
Clean the appliance inside and out before the moving day. If there are any items that could become detached in transit we suggest you remove them; wrap them up using plenty of bubble wrap and pack them in a separate box. You should use tape, bungees or rope to secure the door shut. Protect the corners with extra cardboard and plastic casing before wrapping the whole cooker in blankets.
Packing your kitchen: Microwaves
Clean your microwave first. You can place a cup of lemon juice and water inside for about a minute or so. This will help to loosen up any dried food and grease. Remove the glass plate from inside and be sure to wrap this individually using bubble wrap and tissue paper. Ideally, you want to pack this vertically within a packing box of other kitchen items and dishes. Leave a post-it in the microwave with the number of the box.
You can choose to either move your microwave as it is or put it into a suitable box. We recommend this latter option. When choosing a box, make sure it is several inches larger so that you can add a layer of protection like foam or bubble wrap. Tape the box up making sure to mark it as ‘This Way up’.
If you choose not to box it, secure the door with rope or a bungee cord, don’t use tape as this tends to leave a residue. Use some moving blankets or towels to cover the microwave and secure it with packing tape, finally, place a layer of cardboard on to the front to protect the glass and tape securely.
Place the microwave in the van where you are sure it will not fall or move during transit.
Packing your kitchen: Dining Table
Ideally, it is best to remove the legs from the table. Place all hardware into a plastic bag and tape securely to the underside of the tabletop. Wrap each leg securely in bubble wrap. Next, wrap the tabletop in bubble wrap, add an extra layer of moving blankets and tape together with packing tape.
When loading the tabletop onto the van be sure to secure it to the sides using straps or ropes. Place the legs somewhere where they are unlikely to move or fall.
If it is not possible to remove the legs from the tabletop add extra protection to the corners using cardboard or protective casing. Wrap the table as a whole in moving blankets. You will need two to four people to move this depending on the size and weight of the table. Take extra care when manoeuvring through doorways. Once on the van place the table right side up and use the space underneath for heavier boxes. Place lighter items on top.
Packing your kitchen: Dining Chairs and Stools
It is not necessary to dismantle chairs and bar stools as they usually fit through doors and tight spaces assembled. They are usually easy to lift by one person and stack neatly one on top of the other. Protect the legs with bubble wrap. If the seats are upholstered, cover them in shrink wrap to protect them from dust and dirt. If the seats have cushions take them off and pack them separately into protective bags. Remember to use these as fillers to pad out empty spaces.
Move chairs and bar stools by the seat rather than the backs, carry them out to the van one by one and stack them in groups of two with one upside down on the other – this will save space on the van. Strap each set of two together with rope or bungee cords and secure them to the side of the van or heavier furniture so that they don’t move during transit.
Packing your kitchen: Boxes
Start well in advance! If you end up packing your kitchen in a rush you are likely to regret it. It is so full of individual items that planning and preparation are key.
Get plenty of boxes and other packaging materials. You will need boxes of various sizes and strengths (some kitchen items can be extremely heavy). Ideally, some boxes should have dividers for bottles and the like. You will need plenty of paper and bubble wrap, tape and pens for labelling boxes so that you can find things easily at the delivery destination. Try to be more specific when labelling kitchen boxes, for example, it is better to write ‘cutlery’ and not just ‘kitchen’.
Tackle one area at a time. In order to minimise the disruption and mess, try to be disciplined about completing a cupboard or drawer before moving on, otherwise, you could find that all the difficult items are still lying around at the end of the day.
Start with areas containing rarely used items. There are plenty of things you’ll be able to manage without for a while so they are the things to start packing your kitchen with. These are likely to include appliances such as ice cream, pasta or bread makers as well as cake tins, mixers and so on. Cookbooks should all be packed together. Remember they can get very heavy, so be careful not to overload a box of books.
Sort as you go. Have a box put to one side to receive anything that is going to the local charity shop. We’ve all got appliances or wedding gifts that we never used – please bear in mind space and weight allowance: If you don’t need it, don’t take it. This is also a good time to discard things that are broken or redundant so have a big bin beside you as you sort. Take your broken electrical items to your local recycling centre. Try to keep things together so that they are easy to find and unpack at the other end, e.g. a box for crockery, another for flatware.
Try to use up foodstuffs. Most foodstuffs are not worth the trouble and expense of moving. By starting to plan early enough, you should be able to minimise the amount of food in the house in the run-up to the move. Don’t forget the contents of the freezer – you can’t transport these unless your new place is very close by, and even then it’s probably not worth the hassle. If you can’t use it up, give it away or chuck it out. Inevitably, there will be things leftover in most well-stocked family kitchens, such as spices and spirits which you will want to take with you.
Consider essentials. Leave out items that you will use right up to the move or want straight away when you arrive. These are likely to include a small amount of cutlery and crockery, a kettle, and coffee or tea, as well as a few basic cleaning items and foodstuffs for the family. Paper cups and plastic spoons are useful, they save on washing up. Remember, you could arrive tired and hungry in the middle of the night. If you want to open a bottle on arriving at your new home, remember the glasses and corkscrew!
It’s a good idea, too, to have a knife to open the rest of your boxes, and torches, lightbulbs, candles, matches and loo roll, just to be on the safe side. Make sure you have a labelled box to put these essentials into at the last minute so that you can locate them immediately on arrival. That way you can manage without unpacking everything. You may want to keep this box with you on the journey in your car, rather than loading it onto the removals vehicle, so it’s at hand as soon as you arrive.
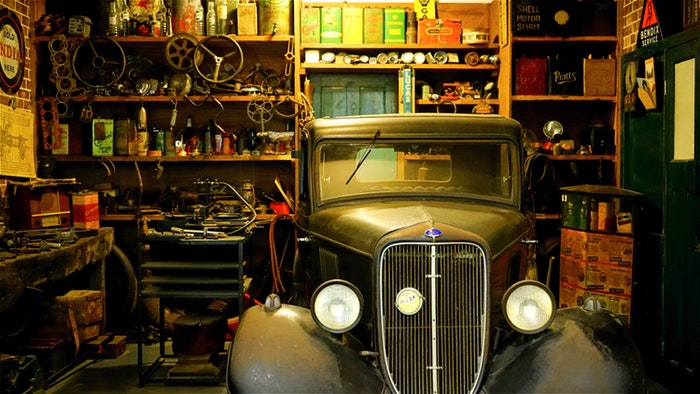
How to pack your Garage and your shed
Packing your garage may be the most daunting room to tackle when preparing to move home. It is rarely tidy and full of things you could not bring yourself to throw away. However, it is an excellent room to start with, as you probably rarely use what it holds. The following guide may help.
Packing your Garage: Lawnmowers
If it is a petrol lawnmower make sure you drain the tank of its fuel, syphon any leftover into a suitable container. Also, make sure the spark plug is disconnected, so the mower doesn’t start on its own, and drain any oil. Cover the blades with duct tape or remove them altogether for safe transport. You can wheel the mower directly into the van.
For ride-on mowers, you can follow the same steps, but you may wish to drive it onto the van before emptying the tanks of fuel and oil. Please remember we do not supply ramps and you will need to ensure the correct loading equipment is available at both collection and delivery points.
Packing your Garage: Heavy workshop tools
If you are a keen DIYer and have such items, you may want to call in riggers to move bulky items such as a table saw, drill press, band saw or planer when you start packing your garage.
If you choose to move them yourself, be sure to dismantle the more delicate components in order both to reduce the weight and to offer extra protection. It is best to wrap these components individually in plenty of bubble wrap and label each box clearly. Mark as fragile if necessary.
Take the time you need to consider how you are going to move them into the moving van. You can invest or build mobile platforms. Again, please remember that we do not supply any loading equipment so you must ensure this is available for both collection and delivery.
Packing your Garage: Hand and power tools
Wrap hand tools in the same way you would any other items using plenty of bubble wrap and pack inside a moving box taking time to load the heavier ones at the bottom. Secure the cords on power tools with zip ties and disconnect the batteries on cordless tools. Keep all batteries and chargers in the same box. Try and keep the weight of each box under 15 kg.
When packing your garage, we recommend you keep some smaller hand tools unpacked until the last minute as you may need them for disassembling and reassembling furniture. It is handy to have a bag or box of different screwdrivers, Allen keys, an adjustable wrench, socket set and cordless drill readily available at all times.
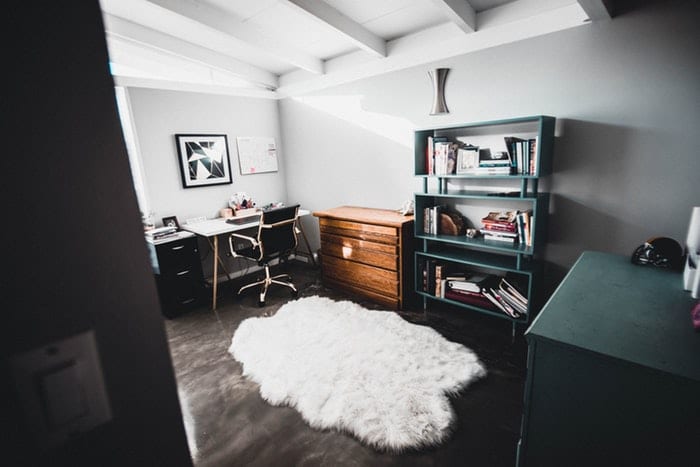
How to pack your Office
Packing your office should be reasonably straightforward but remember to finish the room you started before going to the next one. The following guidelines may help.
Packing your office: Desks
Empty the desk completely, pack all the smaller items into boxes and be sure to wrap fragile items in tissue paper and bubble wrap. Place heavier items on the bottom and lighter items on the top. If the desk has a keyboard tray, remove it, wrap it in bubble wrap and place it into a moving box with the rest of your office bits.
Check the dimensions and decide whether the desk will need to be dismantled or not. Consider doorways and passageways at both the collection and delivery addresses. Weight can also influence your decision. If you choose to dismantle the desk place all hardware in a clearly labelled plastic bag or a separate box. Wrap each individual part in bubble wrap and secure with packing tape.
If you are moving the desk assembled wrap it entirely with moving blankets and secure it with packing tape making sure not to get any type of the surface of the desk as it may leave a residue. Take extra care with the corners, using extra cardboard or plastic casing.
You will need at least two people to lift and manoeuvre it, once it is on the van use the space underneath for heavier boxes to prevent it from moving around in transit, lighter boxes and items can be placed on top.
Packing your office: Safes
One of the joys of packing your office is that you may have a safe. Moving the safe itself can be quite challenging if it is an old, heavy safe. It may reduce your weight allowance significantly. If it is one of the more modern ones, please, you may want the company that installed it to unseal it prior to moving day. If you have anything of particularly high value or sentimental value you may wish to remove them and carry them with you in your bag or glove compartment of your car.
It is good practice to make duplicate copies of any important paperwork. If you were unfortunate enough to lose one set you would have a backup. To make the safe lighter the door can be removed beforehand. Wrap the safe in moving blankets and secure it with packing tape. Please remember our vans do not carry any loading equipment, therefore, make sure you have a trolley available.
Packing your office: Filing Cabinets
Start by clearing out any unwanted documents and paperwork. Make sure you dispose of any personal information in a secure way. Separate any important documents like birth and marriage certificate, you may wish to carry these with you. Pack any other documents into a moving box and label them clearly. Mind the weight of each box (15 kg)
Once the filing cabinet is empty, lock the drawers closed so that they don’t come open during transit. Using moving blankets to cover the cabinet completely and secure it with packing tape. You will need at least two people to lift and move the cabinet, you may also require a trolley to move it from the house to the van, please remember our vans do not carry any moving equipment.
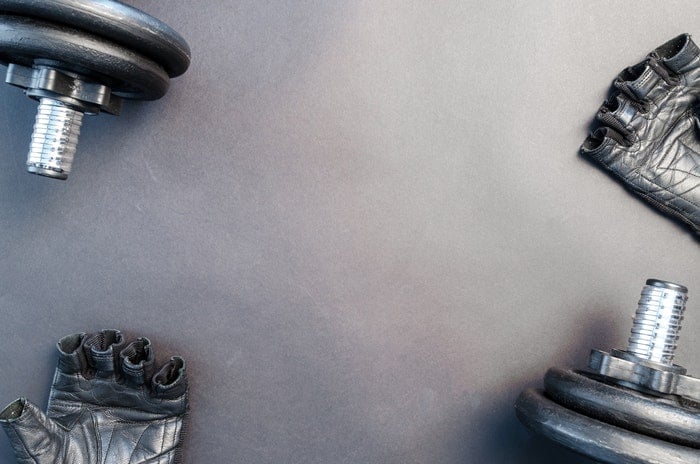
How to pack your Gym
Packing your gym should be quick and easy but the items will probably be quite heavy. The following guide may help.
Packing your Gym: Exercise bikes
Stationary bikes are relatively easy to move. It is a good idea to use a towel or some cardboard to place underneath when you are sliding between rooms. Most bikes can be lifted by one person, however, if you are moving up or downstairs then you are more likely to require two people. Make sure you tape any wires or cords secure to the bike to prevent tripping.
Packing your Gym: Treadmills
Some treadmills fold up which is a great way to save space. If you do have a folding machine simply secure the power cord with some cable ties and slide along the floor using some cardboard or a towel. It is likely that you will need two or more people to lift and manoeuvre the machine. Once in the van, you can cover it with moving blankets.
If the machine doesn’t fold you will certainly require two or more people to lift and manoeuvre it. You may find it easier to disassemble the equipment and put it back together at the delivery address (take photos of the dismantling). If you choose to do this, make sure you place all the hardware in a bag that you will tape securely to the machine. If you are moving it assembled it is best to leave the front end on the ground and use a towel or some cardboard to move along the floor. Once in the van, you can cover it with moving blankets to minimise transit damages.
Packing your Gym: Rowing Machines
Most rowing machines fold up which makes them relatively easy to move. Make sure the handles have been secured with zip ties or cord. The entire machine can be wrapped in moving blankets and secured down with tape.
Packing your Gym: Hand weights and small home gym equipment
This is the more difficult part of packing your gym: Free weights, hand weights and other exercise equipment can be packed into moving boxes. Reinforce the bottom of the boxes with extra cardboard and packing tape. Be mindful not to overload the boxes and make them too heavy to lift.